by segareplay.com | Jan 25, 2025 | Blog
Due to the popularity of the Sega Saturn in the Japan, much more was done with the system there than what would ever reach Western shores. Amongst those additions was the 1 MB and 4MB RAM expansion carts which could expand the stock hardware’s original 2mb “working RAM” for expended gameplay experiences.
These expansion devices plug into the rear cartridge port of the system and for all intents and purposes, simply added more system RAM which the Saturn could utilize for playing software. What this does is to allow the console to load more “active” game files into system memory when playing. When playing the game, active code such as sprite animations are loaded into this working RAM to be displayed on screen. The rest of the game data is loaded as needed. This creates a bottleneck limiting only those 2mb of the total game which can be active at any given time. When you plug in a RAM expansion cart, you are simply adding additional working RAM which the system can actively utilize (3mb for the 1mb expansion cart, and 4mb for the 2mb expansion cart). Most games that utilized this feature used it to increase the number of on-screen animations happening at any given time. Clever programming could work around this for most titles, but where it is most evident is in 2D fighting games where extra frames of animation could make a very visible difference and it was harder to program around the RAM limitation. As such, the majority of games which utilize this feature are 2D fighting games. This is an over-simplified explanation but I believe it creates the general understanding most people need.
These expansion carts were never officially released in the West where the Saturn performed poorly on the market, but were popular enough to come in several sizes. The most commonly utilized of these was the 1mb and 4mb varieties. Some Western games even supported the carts but this was never advertised, most famous of these would be Marvel Super Heroes which can optionally take advantage of the 1mb expansion, but does not require it. If you were to utilize this cartridge when playing it, you will see smoother and more detailed animations when playing.
4MB Ram Expansion Cart
Unlike Marvel Super Heroes, some other games didn’t make the cart optional, a testament to the success of this add-on, unlike many of Sega’s expansion attempts in the West. The problem with titles which do require the cart is the simple fact that they are completely unplayable without it. Fortunately, for us modern Western gamers, these carts are now cheap and easy to get on sites such as eBay. Furthermore, certain versions of the modern Pseudo Saturn Kai cartridge offer this functionality such as our 5 in 1 version (available in our shop) which allows you to switch between standard, 1mb, or 4mb modes.
The following is our aggregated list of games which either optionally use, or require the RAM expansion cartridge:
Astra Superstars (Optional)
Cotton 2 (Optional)
Cyberbots (Optional)
Fatal Fury 3
Fighter’s History Dynamite
Friends: Seishun no Kagayaki (Optional)
Groove On Fight
King of Fighters ’96
King of Fighters ’97
King of Fighters, The: Best Collection
KOF Double Pack: King of Fighters ’95 & ’96
Marvel Super Heroes (Optional)
Metal Slug
Noel 3 Limited Edition (Optional)
Noel 3 (Optional)
Pia the Carrot (Optional)
Ragnagard
Real Bout Fatal Fury
Real Bout Fatal Fury Special
Real Bout Garou Densetsu Best Collection
Real Bout Garou Densetsu Special
Samuari Showdown IV
Samurai Showdown III
Samurai Spirits Best Collection
Samurai Spirits: Amakusa Kourin
Samurai Spirits: Zankurou Musouken
Super Real Mahjong P7 (Optional)
Super Real Mahjong P7 P’s Club Limited Edition (Optional)
Waku Waku 7
Astra Superstars (Optional)
Cotton 2 (Optional)
Cyberbots Full Metal Madness (Optional)
Dungeons & Dragons Collection
Fighter’s History Dynamite
Final Fight Revenge
Friends: Seishun no Kagayaki
Groove on Fight
King of Fighters ’96
King of Fighters ’97
King of Fighters, The: Best Collection
KOF Double Pack: King of Fighters ’95 & ’96
Marvel Super Heroes (Optional)
Marvel Super Heroes vs Street Fighter
Metal Slug
Noel 3
Noel 3 Limited Edition
Pia the Carrot (Optional)
Pocket Fighter (Optional)
Real Bout Fatal Fury Special
Samurai Spirits Best Collection
Samurai Spirits: Amakusa Kourin
Samurai Spirits: Zankurou Musouken
Street Fighter Zero 3
Super Real Mahjong P7
Vampire Savior
Waku Waku 7
X-Men vs. Street Fighter
NOTE: These lists may not be exhaustive.
by segareplay.com | Jan 1, 2025 | Blog, Tutorials
In the Dreamcast retro scene, the console is unfortunately notorious for laser problems. While there are a variety of reasons behind this including simple age, the issue is fundamentally a consequence of economics. At the time of the console’s creation, Sega was deep in debt and was forced to use lower quality components than in previous consoles. As a result, finding consoles marked “powers on but won’t read discs” is an all to common site on places like eBay. Today we will discuss some simple hacks that will help many people get reproduction CDI games to play, and possibly fix a dead Dreamcast, too!
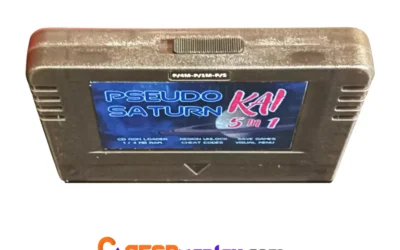
First, we must discuss compatibility. Winding back the clock, Dreamcast consoles first produced in 1999 had a serious flaw. Sega had made proprietary GD-ROM drives and corresponding disc format to help subvert piracy. This, had it been by itself, did indeed work well as designed. However, Sega had also made the Dreamcast able to play CD+G discs, a format once used for music videos and similar media. What the designers hadn’t counted on was the ingenuity of hackers. The console wasn’t even a year old when the first pirated copies of games began appearing using a format we now call, “CDI”. These games boot past the Dreamcast security by making the console think it is a CD+G disc, which in one sense it is, and then booting as a game once past the security check. While this helped usher in the early death of the console (amongst other factors), it would secure a second-life for the Dreamcast years later as it made the console open to new development by indie developers and access to retro games many would otherwise not be able to afford.
With every upside, there is a downside. For modern Dreamcast gamers playing burned games, there are two. First, the standard CD-ROM disc can only hold 700mb, whereas the GD-ROM discs could hold 1.2gb. This is why some reproduction games come on more discs than the original titles did. D2, for example, came on 4 GD-ROM discs commercially, whereas today, it comes on 7 discs when burned in the CDI format on CD-ROMs. This is the most extreme example, but it does help accentuate the point. Second, and most importantly for our purposes, GD-ROMs were “pressed” (like even modern games are produced) whereas modern CDI reproductions must be “burned”. The reason is simple; cost. A machine required to “press” discs is far beyond the reach of any small shop in this market, let alone the other technical aspects which would come along with this method. This is important as it takes less energy and/or tuning for a laser to read a pressed disc than it does to read a burned disc. This is why some Dreamcast can still play the original games but struggle to play burned games. Fortunately, there are ways around this.
Now before we move on to the fixes, we must address the elephant in the room; compatibility. The thing is, Sega did figure out what was going on before the end, and did issue a fix in the console bios that eliminated the CDI work-around in most Revision 2 consoles. Many sources online will tell you that only revisions 0 and 1 can play burned games. This is not correct. Some revision 2s will play CDIs (I have one of them myself). What is more important is the date of manufacture. Depending upon the source you go by, Sega began issuing the new bios in either September or October of 2000. What this means is that you need to flip over your console and look on the bottom for the date of manufacture. If your console was made on or before September 2000, you should be able to play reproductions. If it was made from October 2000 or later, you unfortunately cannot play burned CDIs and there is not a work-around for this.
SHORT-TERM HACKS
The simplest, but far from full-proof method is as follows:
- Allow the console to run for approximately 10 minutes to warm up the laser.
- Restart the “warm” console with the disc inside. If the game does not boot on its own, select “play” on the menu and press the “a” button.
- If the games does not read, immediately restart the console and repeat the steps in #2. You may need to do this multiple times before the laser is able to “grab” the first track on the disc.
Alternative methods if buring the discs yourself:
- Try burning the disc using different software. The three recommended for the Dreamcast are: Imgburn, Alcohol 120%, or Disc Juggler. If using either of these, be sure to search for a tutorial so you can be sure you are using the correct settings. You can’t just burn the disc using the standard method and must adjust some settings to get a game to work.
- Try burning the disc on alternative CD-ROM brands. Several popular brands for reproductions are: Memorex, Verbatim, and Taiyo-Yuden (CMC Pro). Be sure not to use generic brands as the quality is often not good enough to be readable and/or causes unnecessary wear on the Dreamcast laser.
LONG-TERM HACKS
The simplest and most cost-effective method that has a good chance of working:
A full-proof but more costly method:
- Replace the laser. These are readily available and not too expensive to replace. You can do it yourself for somewhere around $50-80 or hire someone like Sega Replay to do it for you (we charge $100 for parts and labor plus shipping).
The best method but the most costly method:
- Replace your laser with a disc drive emulator known as a GDEMU. This is more time consuming and more expensive but makes collecting and playing on the Dreamcast far easier and affordable in the long run. With this, you can simply load the games you want on to an SD Card and play! No need for pesky lasers going bad! This will run you somewhere around $100-150 if you do it yourself (this includes the GDEMU, Mounting hardware, and SD Card). Again, you can also find someone like Sega Replay to do it for you or even buy these premade in our store or on places like eBay (be sure to look at the seller’s reviews before buying!).
In short, your likely culperit is your laser. If you are burning games yourself, check your methods/media unless you’ve been dong this successfully for a while in which case it’s probably your laser. If you are a consumer, ask your seller if they are testing every game on OEM hardware prior to shipping. Many shops only test the game image in an emulator or spot test games periodically. If they aren’t testing every game like we do at Sega Replay, then you could be getting a “bad burn”. However, most sellers are using the same methods/media which are pretty reliable. If you are experiencing these issues, my guess is it’s probably your laser.
by segareplay.com | Sep 6, 2024 | Blog, Tutorials
In this article we will discuss updating a Pseudo Saturn Kai (PSK) cartridge firmware on an existing PSK cartridge, Game Shark, or Action Replay. This is not a tutorial for installing a firmware update on a “Gamer’s Cartridge” or from scratch. You must have some sort of PSK software already installed for this to work.
Before we begin, we must offer thanks to PPCenter and for their invaluable tools, resources and walk-throughs, along with Darius whom developed the original tutorial . Without them, this article would not be possible.
Disclaimer: “Sega Replay is not liable for any damage caused to a Pseudo Saturn Kai cartridge by utilizing this tutorial. Though we have successfully tested the functionality of it, and most reports online have found it to be safe, a small number of individuals have suffered ‘bricking’ of their cartridge, making it unusable. By continuing with this guide, you explicitly acknowledge the risks and agree to not hold Sega Replay liable for any ill-effects of its use.”
What you will need:
- PC or Mac.
- CD burner.
- Blank CD-R disc.
- Pseudo Saturn Kai or Action Replay cartridge.
- Sega Saturn console with operational disc drive (any region).
Verify the version of your Pseudo Saturn Kai cartridge before you begin. It must be an older version to work and is not designed to “re-flash” the current version. At the time of writing this article, the current version is 6.483, so it must be an earlier version than this. Flashing the same version may have unpredictable consequences.
Step 1.
Download the latest version of of the Pseudo Saturn Kai firmware flasher utility. As of of September 2024, that version is 6.545 and can be downloaded by clicking here. If you are reading this much further in the future (a year or so more), check the ppc website for the latest version.
Step 2.
Burn the downloaded PSK flasher utility to the blank CD-R. For an Action Replay, Game Shark, or standard PSK cartridge, you will need to select the “Lite” folder and burn the disc image titled “pskai_flasher_lite”.
%27%20fill-opacity%3D%27.5%27%3E%3Cellipse%20fill%3D%22%23585858%22%20fill-opacity%3D%22.5%22%20rx%3D%221%22%20ry%3D%221%22%20transform%3D%22matrix(-.412%2023.86603%20-92.98927%20-1.60531%2076.7%20.6)%22%2F%3E%3Cpath%20fill%3D%22%231f1f1f%22%20fill-opacity%3D%22.5%22%20d%3D%22M18.9%2016l27.3%201.5%20272%20208.5-336.4%2031.2z%22%2F%3E%3Cpath%20fill%3D%22%231f1f1f%22%20fill-opacity%3D%22.5%22%20d%3D%22M294.7%20241.1l18-225-202.5.2%2028.3%2011.5z%22%2F%3E%3Cpath%20fill%3D%22%23444%22%20fill-opacity%3D%22.5%22%20d%3D%22M164.6%2015.8l-62-34-120.8%2031.7z%22%2F%3E%3C%2Fg%3E%3C%2Fsvg%3E)
Select the “lite” folder for Action Replay, Game Shark, or regular Pseudo Saturn Kai cartridges.
%27%20fill-opacity%3D%27.5%27%3E%3Cellipse%20fill%3D%22%23585858%22%20fill-opacity%3D%22.5%22%20rx%3D%221%22%20ry%3D%221%22%20transform%3D%22rotate(179.8%2048.9%20.4)%20scale(82.44164%2023.66698)%22%2F%3E%3Cpath%20fill%3D%22%230e0e0e%22%20fill-opacity%3D%22.5%22%20d%3D%22M121.3%2017h34v5.9h-34z%22%2F%3E%3Cpath%20fill%3D%22%23444%22%20fill-opacity%3D%22.5%22%20d%3D%22M61.8%2025.2L18-17.7%20168.7%206l-66.5%2015.5z%22%2F%3E%3Cpath%20fill%3D%22%231f1f1f%22%20fill-opacity%3D%22.5%22%20d%3D%22M58.6%2017.2l-25.9-2.3L318.2%20164l-336.4%2044z%22%2F%3E%3C%2Fg%3E%3C%2Fsvg%3E)
With your disc burning utility (for this example we used “ImgBurn”, select the “pskai_flasher_lite” disc image file.
Step 4.
Install the destination cartridge in your Saturn’s cartridge slot but do not insert the CD-R with the burned copy of the PSK flasher utility yet, and power on your Sega Saturn console. Once powered on and the PSK menu is present, insert the CD-R with the PSK flasher utility. NOTE: if you insert the disk before powering on, the Saturn will likely attempt to read the disc first and you will get an error indicating incompatibility.
Step 5.
At the “Main Menu” menu, highlight “Start Game” and press the “A” button.
%22%20transform%3D%22translate(.6%20.6)%20scale(1.17188)%22%20fill-opacity%3D%22.5%22%3E%3Cellipse%20fill%3D%22%23a6a7a3%22%20cx%3D%22119%22%20cy%3D%2232%22%20rx%3D%2271%22%20ry%3D%2243%22%2F%3E%3Cellipse%20fill%3D%22%230e0a26%22%20rx%3D%221%22%20ry%3D%221%22%20transform%3D%22matrix(36.4415%20-3.35952%207.02834%2076.23814%20241%2048)%22%2F%3E%3Cellipse%20fill%3D%22%23232037%22%20rx%3D%221%22%20ry%3D%221%22%20transform%3D%22matrix(34.77374%20-3.4531%207.01676%2070.66086%200%2032)%22%2F%3E%3Cellipse%20fill%3D%22%230a003d%22%20cx%3D%22249%22%20cy%3D%2216%22%20rx%3D%2218%22%20ry%3D%2260%22%2F%3E%3C%2Fg%3E%3C%2Fsvg%3E)
Step 6
At the “Select Game Loader” menu, highlight “CWX (PS 0.831)” and press the “A” button.
%27%20fill-opacity%3D%27.5%27%3E%3Cellipse%20fill%3D%22%23a4a4a4%22%20fill-opacity%3D%22.5%22%20rx%3D%221%22%20ry%3D%221%22%20transform%3D%22matrix(.26893%2044.01861%20-80.10608%20.4894%20140%20.6)%22%2F%3E%3Cpath%20fill%3D%22%232b2b2b%22%20fill-opacity%3D%22.5%22%20d%3D%22M299.4%20160l2.4-178.2L181%20102.5zM13%2020.5l65.8%2073.2-90.6%2081.5-65.8-73.1z%22%2F%3E%3Cellipse%20fill%3D%22%236b6b6b%22%20fill-opacity%3D%22.5%22%20rx%3D%221%22%20ry%3D%221%22%20transform%3D%22rotate(46.2%20-52.3%20204.3)%20scale(146.52439%2040.97256)%22%2F%3E%3C%2Fg%3E%3C%2Fsvg%3E)
Step 7
At the “Select ROM Hacks” menu, highlight “Off” and press the “A” button.
%27%20fill-opacity%3D%27.5%27%3E%3Cellipse%20fill%3D%22%23a7a7a6%22%20fill-opacity%3D%22.5%22%20rx%3D%221%22%20ry%3D%221%22%20transform%3D%22matrix(.75167%20-43.06338%2064.01367%201.11736%20137.3%208.5)%22%2F%3E%3Cellipse%20fill%3D%22%23000009%22%20fill-opacity%3D%22.5%22%20rx%3D%221%22%20ry%3D%221%22%20transform%3D%22rotate(7.2%20-190.8%202389)%20scale(35.3091%2066.61466)%22%2F%3E%3Cellipse%20fill%3D%22%23323231%22%20fill-opacity%3D%22.5%22%20rx%3D%221%22%20ry%3D%221%22%20transform%3D%22matrix(-36.5528%20-.2552%20.73564%20-105.371%2021.7%2099.5)%22%2F%3E%3Cellipse%20fill%3D%22%232b2a2f%22%20fill-opacity%3D%22.5%22%20rx%3D%221%22%20ry%3D%221%22%20transform%3D%22matrix(30.7182%20-95.10539%2042.27125%2013.65324%20261%2078)%22%2F%3E%3C%2Fg%3E%3C%2Fsvg%3E)
Step 8
At the “Save Data Manager” menu, press the “Right Shoulder” button to display the sub-menu. NOTE: If this menu does not appear, your the PSK firmware flasher was burned incorrectly and must be done again.
%22%20transform%3D%22translate(.6%20.6)%20scale(1.17188)%22%20fill-opacity%3D%22.5%22%3E%3Cellipse%20fill%3D%22%23c7c8be%22%20rx%3D%221%22%20ry%3D%221%22%20transform%3D%22matrix(78.37831%20-3.0753%201.12084%2028.56627%20123.4%2042.1)%22%2F%3E%3Cellipse%20fill%3D%22%231f0c7f%22%20rx%3D%221%22%20ry%3D%221%22%20transform%3D%22matrix(108.42562%20-230.80053%2031.23398%2014.67312%20245.1%2065.8)%22%2F%3E%3Cellipse%20fill%3D%22%234b4e3b%22%20cx%3D%2217%22%20cy%3D%22108%22%20rx%3D%22163%22%20ry%3D%2225%22%2F%3E%3Cellipse%20fill%3D%22%237767cb%22%20rx%3D%221%22%20ry%3D%221%22%20transform%3D%22rotate(105.6%2086.3%20101.6)%20scale(49.87013%2021.79593)%22%2F%3E%3C%2Fg%3E%3C%2Fsvg%3E)
Step 9
At the “Save Data Manager” sub-menu, highlight “Firmware Flasher” and press the “A” button.
%27%20fill-opacity%3D%27.5%27%3E%3Cellipse%20fill%3D%22%23c6c8ba%22%20fill-opacity%3D%22.5%22%20rx%3D%221%22%20ry%3D%221%22%20transform%3D%22matrix(.56426%2032.3266%20-94.92742%201.65696%20138.5%2053.5)%22%2F%3E%3Cellipse%20fill%3D%22%231d0f62%22%20fill-opacity%3D%22.5%22%20rx%3D%221%22%20ry%3D%221%22%20transform%3D%22matrix(92.34297%20-284.20243%2040.88677%2013.28492%20287.8%2080)%22%2F%3E%3Cellipse%20fill%3D%22%23383833%22%20fill-opacity%3D%22.5%22%20rx%3D%221%22%20ry%3D%221%22%20transform%3D%22rotate(80.2%20-48.4%2055.1)%20scale(176.99163%2020.53267)%22%2F%3E%3Cellipse%20fill%3D%22%235d4cb6%22%20fill-opacity%3D%22.5%22%20rx%3D%221%22%20ry%3D%221%22%20transform%3D%22matrix(15.00095%2014.3626%20-53.26527%2055.63268%20210%20118.5)%22%2F%3E%3C%2Fg%3E%3C%2Fsvg%3E)
Step 10
At the “Select Firmware” menu, highlight “Pseudo Saturn Kai Lite” (used for the standard PSK, Action Replay, or Game Shark) and press the “A” button. If using a “Gamer’s Cartridge” select “Pseudo Saturn Kai.” NOTE: In the latest version, the “beta” option will not be present.
%27%20fill-opacity%3D%27.5%27%3E%3Cellipse%20fill%3D%22%23c4c5c0%22%20fill-opacity%3D%22.5%22%20rx%3D%221%22%20ry%3D%221%22%20transform%3D%22matrix(-108.06221%20-2.78872%20.8129%20-31.49933%20140.2%2073.1)%22%2F%3E%3Cellipse%20fill%3D%22%233c3d38%22%20fill-opacity%3D%22.5%22%20rx%3D%221%22%20ry%3D%221%22%20transform%3D%22matrix(-297.69407%20-26.0094%202.16552%20-24.7857%20185.1%20.6)%22%2F%3E%3Cellipse%20fill%3D%22%23311d98%22%20fill-opacity%3D%22.5%22%20rx%3D%221%22%20ry%3D%221%22%20transform%3D%22matrix(-48.26378%2047.59455%20-20.05869%20-20.34073%20280.1%20123.1)%22%2F%3E%3Cpath%20fill%3D%22%234c4d47%22%20fill-opacity%3D%22.5%22%20d%3D%22M235.9%20173.3l-298.1-20.9%203.3-48%20298.1%2021z%22%2F%3E%3C%2Fg%3E%3C%2Fsvg%3E)
Step 11
At the subsequent confirmation screen, simultaneously select the “A+B+C” buttons to flash the firmware. Once complete, the install status should appear on screen. Wait while the disc is read and the cartridge firmware is update. DO NOT PRESS ANY BUTTONS OR TURN-OFF YOUR SATURN.
%27%20fill-opacity%3D%27.5%27%3E%3Cpath%20fill%3D%22%23243a0c%22%20fill-opacity%3D%22.5%22%20d%3D%22M287%20125.6L220%2022.4l70.7-46%2067%20103.2z%22%2F%3E%3Cpath%20fill%3D%22%233c7aaf%22%20fill-opacity%3D%22.5%22%20d%3D%22M138.5%20173.6L11.9%2074.8l85.2-109%20126.5%2098.9z%22%2F%3E%3Cpath%20fill%3D%22%23439354%22%20fill-opacity%3D%22.5%22%20d%3D%22M37-.6l200.3%2041%207-53.9z%22%2F%3E%3Cellipse%20fill%3D%22%23053778%22%20fill-opacity%3D%22.5%22%20rx%3D%221%22%20ry%3D%221%22%20transform%3D%22matrix(41.3997%20-47.30666%2032.08393%2028.07776%20221.5%20127.1)%22%2F%3E%3C%2Fg%3E%3C%2Fsvg%3E)
Step 12
If your install was successful, the “write verification success” message will be displayed. If not, you will need to start over and likely do not have the correct PSK flasher utility installed or your cartridge is not compatible.
%22%20transform%3D%22translate(.6%20.6)%20scale(1.17188)%22%20fill-opacity%3D%22.5%22%3E%3Cellipse%20fill%3D%22%23301c2f%22%20rx%3D%221%22%20ry%3D%221%22%20transform%3D%22matrix(29.41618%20-114.4904%2045.48869%2011.68747%20238.9%2057.1)%22%2F%3E%3Cellipse%20fill%3D%22%235dba94%22%20rx%3D%221%22%20ry%3D%221%22%20transform%3D%22matrix(42.1993%20-20.4527%2017.8663%2036.86287%20106.9%2033.8)%22%2F%3E%3Cellipse%20fill%3D%22%237d585e%22%20cx%3D%2214%22%20cy%3D%2279%22%20rx%3D%2234%22%20ry%3D%2253%22%2F%3E%3Cpath%20fill%3D%22%23154ca7%22%20d%3D%22M202%20134l-5-56-105%2036z%22%2F%3E%3C%2Fg%3E%3C%2Fsvg%3E)
Step 13
On the “Please Select Action” menu which appears after successful installation, highlight “System Reset” and press the “A” button to restart.
%22%20transform%3D%22translate(.6%20.6)%20scale(1.17188)%22%20fill-opacity%3D%22.5%22%3E%3Cellipse%20fill%3D%22%238b8b8b%22%20rx%3D%221%22%20ry%3D%221%22%20transform%3D%22rotate(-177.1%2055.7%208.8)%20scale(87.25781%2059.62502)%22%2F%3E%3Cellipse%20rx%3D%221%22%20ry%3D%221%22%20transform%3D%22matrix(37.32338%2012.81867%20-65.08984%20189.51832%20255%2078.9)%22%2F%3E%3Cellipse%20fill%3D%22%23919191%22%20cx%3D%22111%22%20cy%3D%2227%22%20rx%3D%2252%22%20ry%3D%2227%22%2F%3E%3Cellipse%20fill%3D%22%23383838%22%20cx%3D%2240%22%20cy%3D%2295%22%20rx%3D%22173%22%20ry%3D%2241%22%2F%3E%3C%2Fg%3E%3C%2Fsvg%3E)
MISSION COMPLETE!
You can now play Sega Saturn games with the latest Pseudo Saturn Kai firmware installed! For the best quality and value on reproduction titles, please visit our shop!
by segareplay.com | May 29, 2024 | Sega Saturn History
While doing some research, I located the JCPenny and Sears christmas wishbooks for 1995-1997. It was definitely a walk down memory lane and I wanted to share these finds with my fellow Saturnites.
%27%20fill-opacity%3D%27.5%27%3E%3Cellipse%20fill%3D%22%23fff%22%20fill-opacity%3D%22.5%22%20rx%3D%221%22%20ry%3D%221%22%20transform%3D%22matrix(-31.9202%2090.13984%20-51.90955%20-18.38214%2011.6%20251.4)%22%2F%3E%3Cellipse%20fill%3D%22%23f3f4f4%22%20fill-opacity%3D%22.5%22%20rx%3D%221%22%20ry%3D%221%22%20transform%3D%22rotate(92%2030%2073)%20scale(132.49073%2038.99062)%22%2F%3E%3Cellipse%20fill%3D%22%23414242%22%20fill-opacity%3D%22.5%22%20rx%3D%221%22%20ry%3D%221%22%20transform%3D%22matrix(-50.27065%20-.2144%20.26011%20-60.98904%20205%2076.2)%22%2F%3E%3Cpath%20fill%3D%22%234d484a%22%20fill-opacity%3D%22.5%22%20d%3D%22M-49.1-28.6l81.5-8.6%2018%20170.1-81.7%208.6z%22%2F%3E%3C%2Fg%3E%3C%2Fsvg%3E)
%22%20transform%3D%22translate(.6%20.6)%20scale(1.17188)%22%20fill-opacity%3D%22.5%22%3E%3Cellipse%20fill%3D%22%237d8583%22%20cx%3D%2245%22%20cy%3D%2210%22%20rx%3D%22105%22%20ry%3D%2238%22%2F%3E%3Cellipse%20fill%3D%22%2396878d%22%20rx%3D%221%22%20ry%3D%221%22%20transform%3D%22matrix(-84.76186%204.14161%20-1.64495%20-33.66544%20131%2091.3)%22%2F%3E%3Cellipse%20fill%3D%22%23f5f4f6%22%20rx%3D%221%22%20ry%3D%221%22%20transform%3D%22matrix(1.33735%2069.65024%20-200.96296%203.85869%20105.7%20208.9)%22%2F%3E%3Cpath%20fill%3D%22%23fd8793%22%20d%3D%22M180.5%20137.1L161-21.7l60.5-7.4L241%20129.7z%22%2F%3E%3C%2Fg%3E%3C%2Fsvg%3E)